MicroStructPy - Microstructure Mesh Generation in Python
MicroStructPy is a microstructure mesh generator written in Python. Features of MicroStructPy include:
2D and 3D microstructures
Grain size, shape, orientation, and position control
Polycrystals, amorphous phases, and voids
Mesh verification
Visualizations
Output to common file formats
Customizable workflow

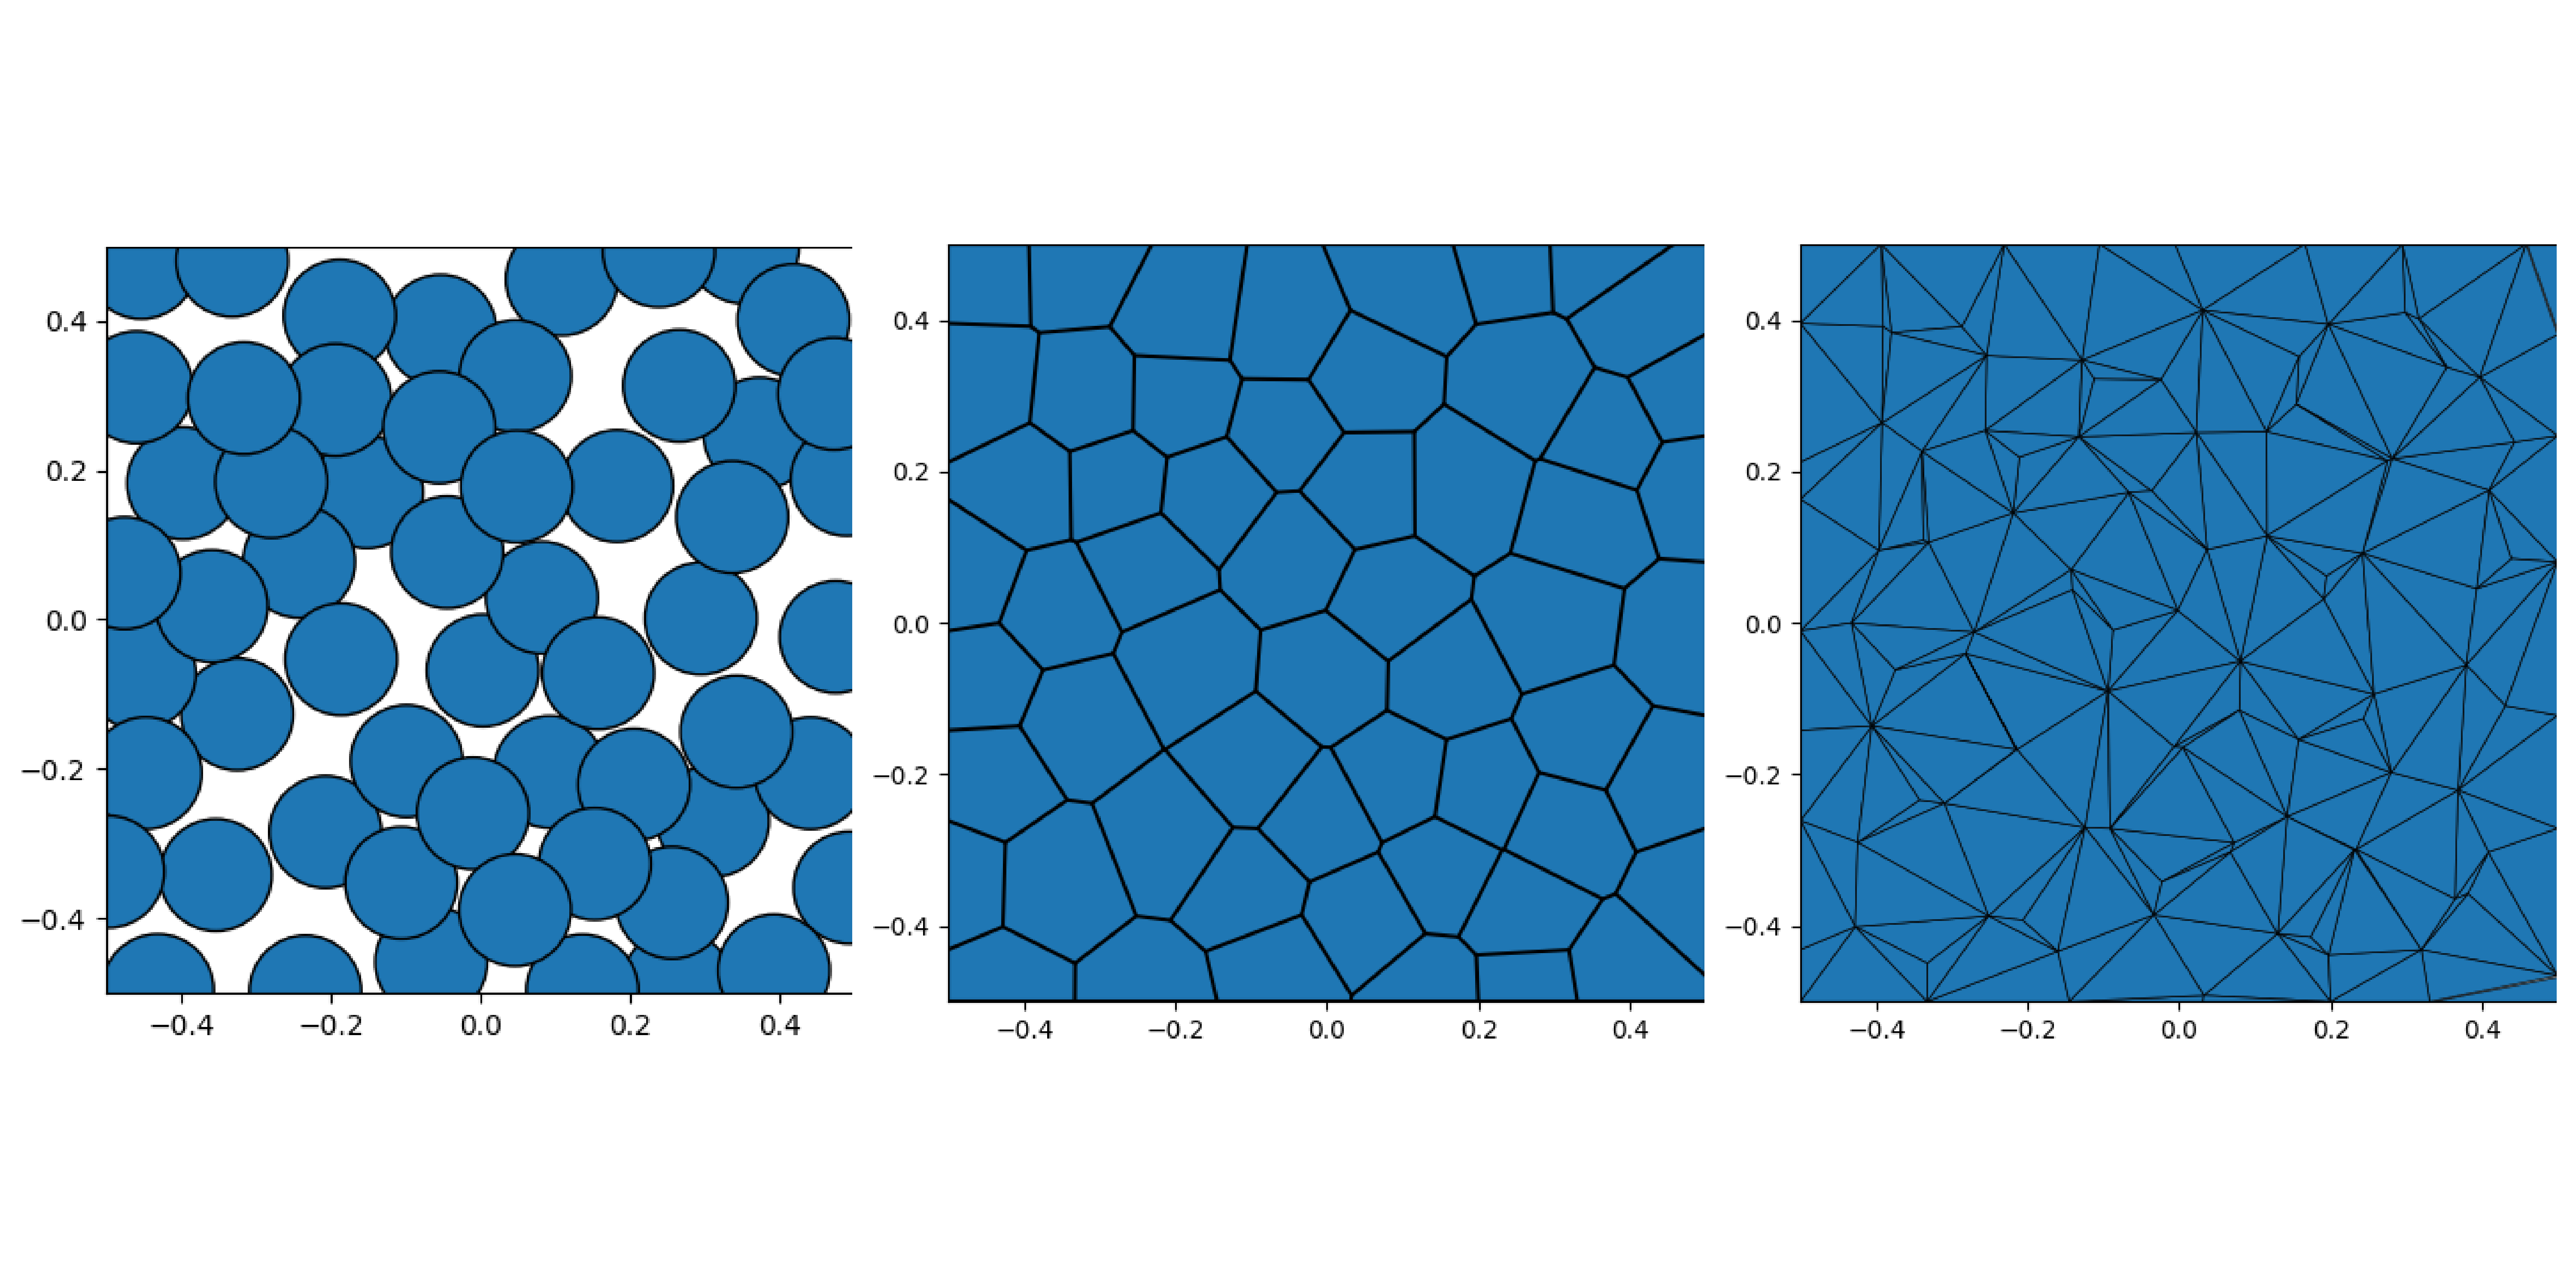
Fig. 1 The primary steps to create a microstructure. 1) seed the domain with particles, 2) create a Voronoi power diagram, and 3) convert the diagram into an unstructured mesh.
Examples
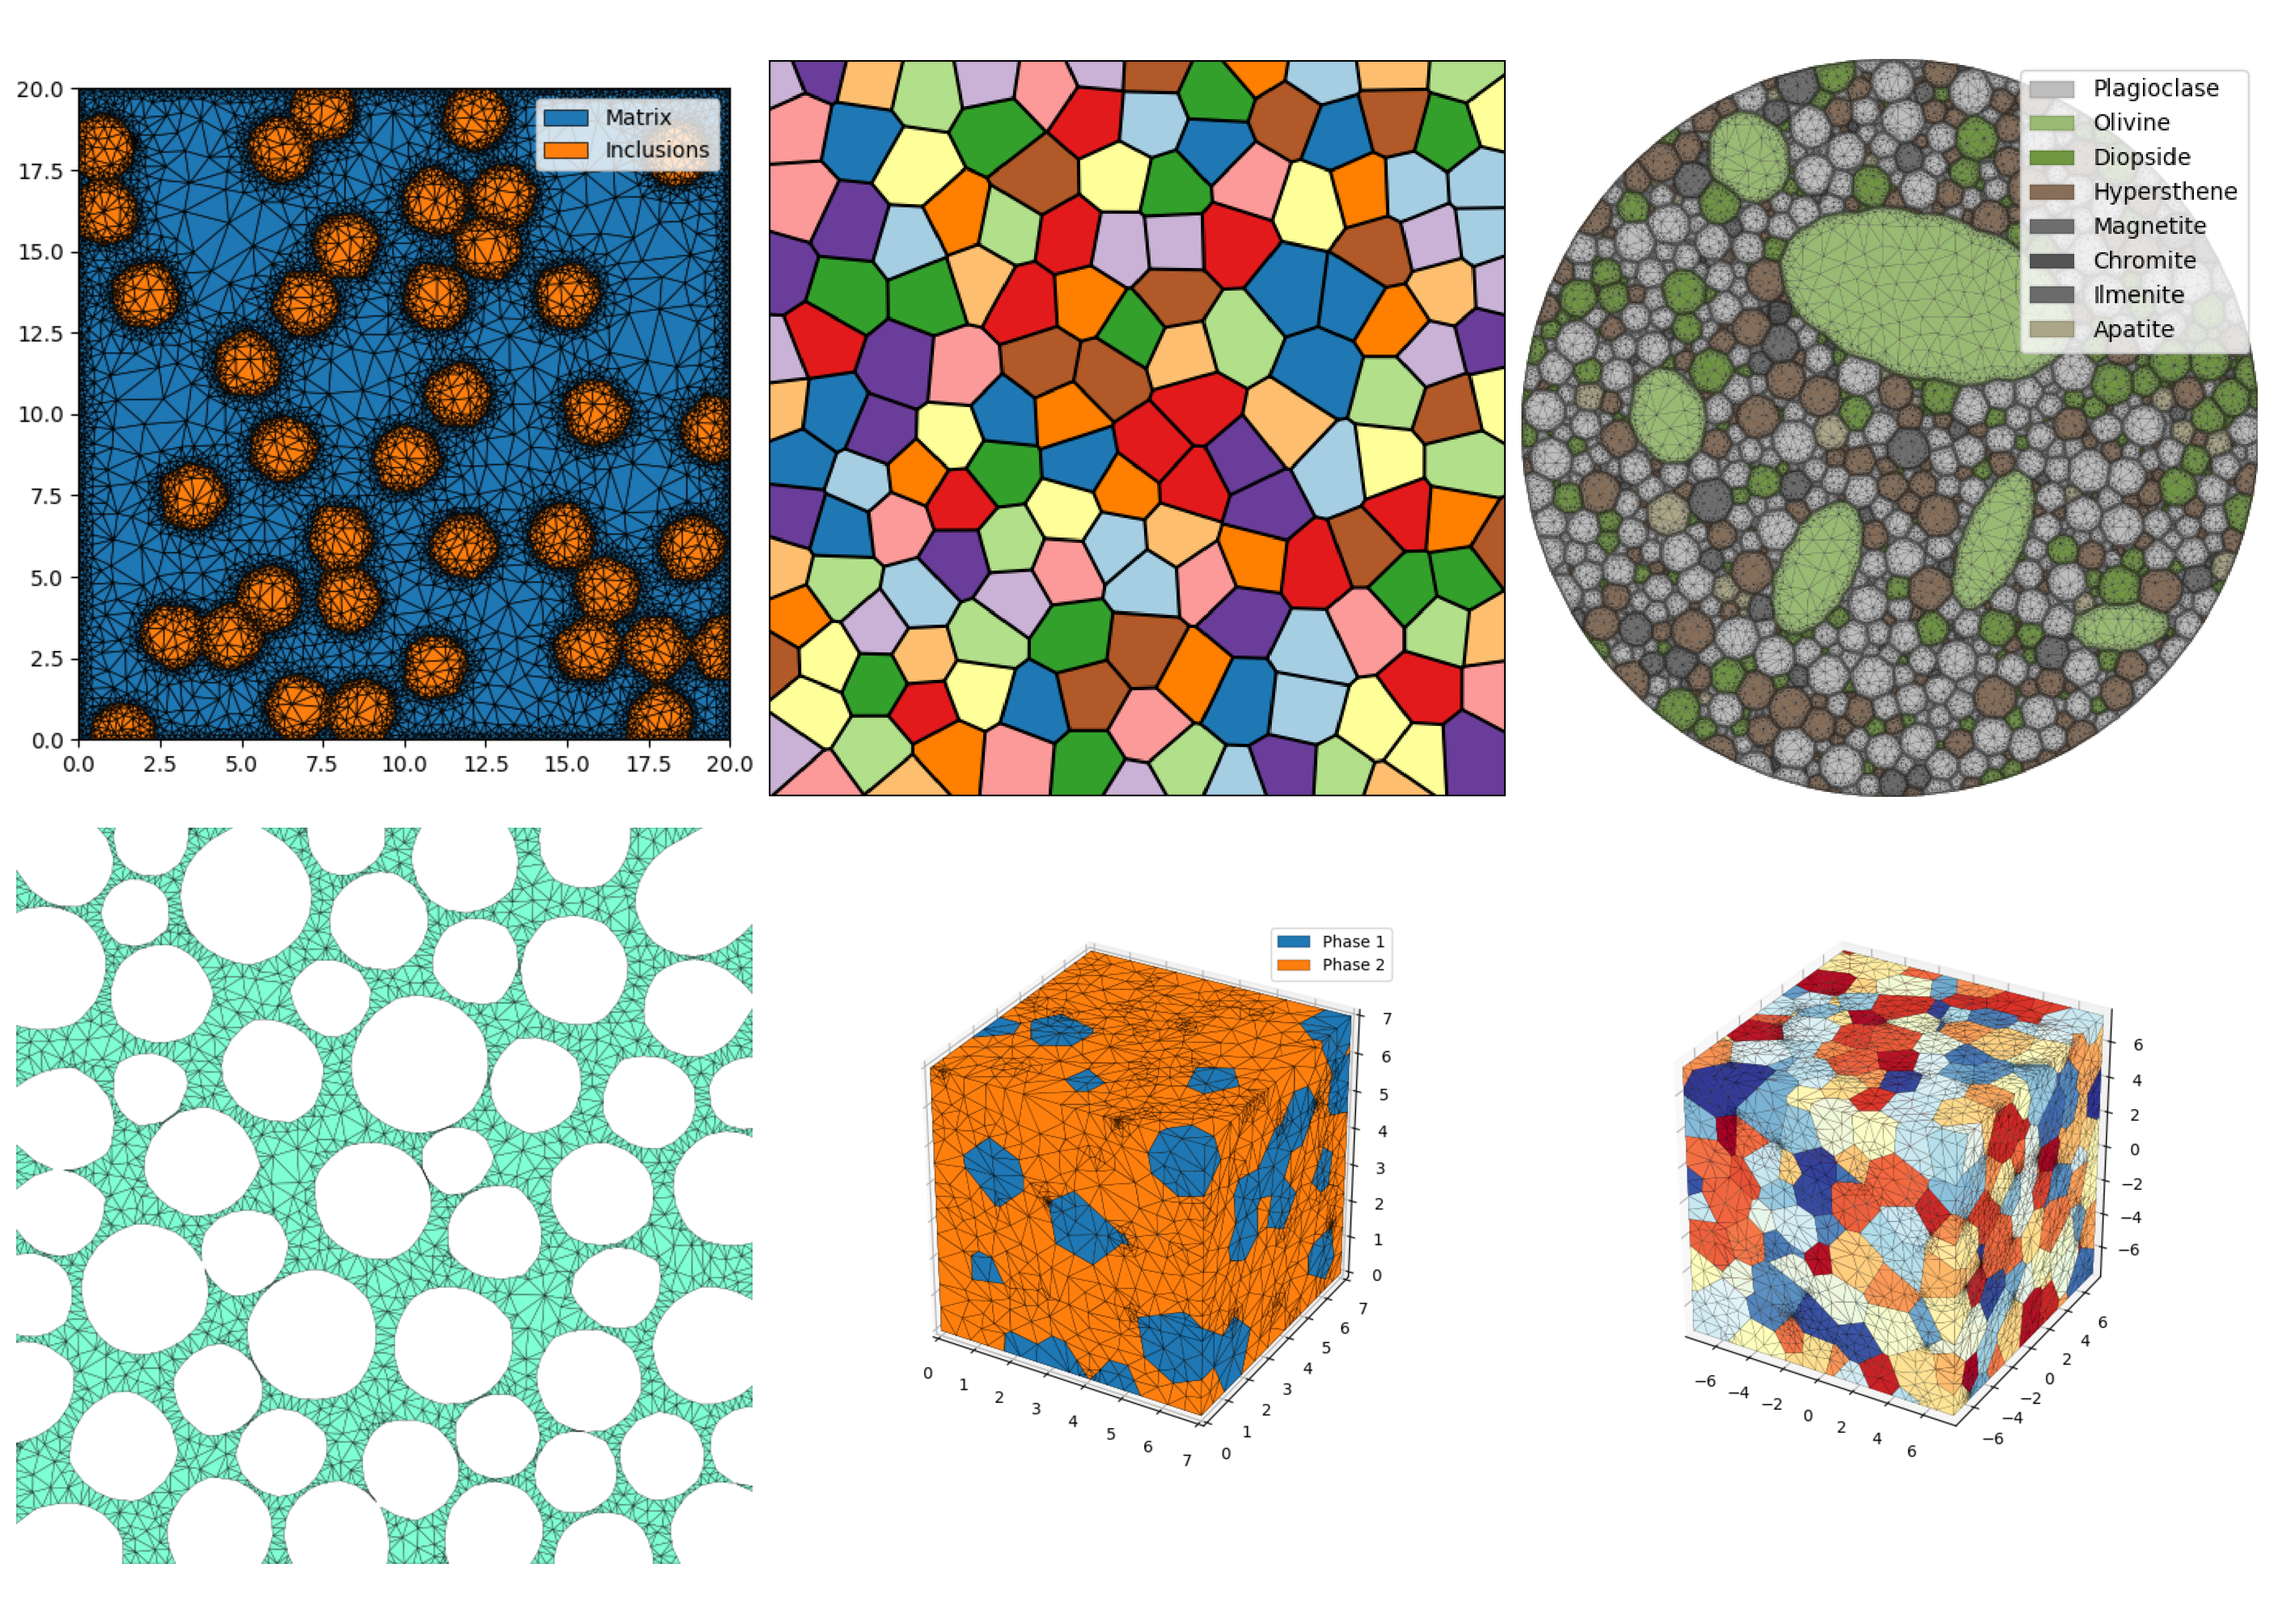
These images were created using MicroStructPy. For more examples, see the Examples section.

Fig. 2 Examples created using MicroStructPy.
Quick Start
To install MicroStructPy, download it from PyPI using:
pip install microstructpy
If there is an error with the install, try pip install pybind11 first,
then install MicroStructPy.
This will create a command line executable and python package both
named microstructpy.
To use the command line interface, create a file called input.xml and copy
this into it:
<?xml version="1.0" encoding="UTF-8"?>
<input>
    <material>
        <shape> circle </shape>
        <size> 0.15 </size>
    </material>

    <domain>
        <shape> square </shape>
    </domain>
</input>
Next, run the file from the command line:
microstructpy input.xml
This will produce three text files and three image files: seeds.txt,
polymesh.txt, trimesh.txt, seeds.png, polymesh.png, and
trimesh.png.
The text files contain all of the data related to the seed geometries and
meshes.
The image files contain:

Fig. 3 The output plots are: 1) seed geometries, 2) polygonal mesh, and 3) triangular mesh.
The same results can be produced using this script:
import matplotlib.pyplot as plt
import microstructpy as msp


phase = {'shape': 'circle', 'size': 0.15}
domain = msp.geometry.Square()

# Unpositioned list of seeds
seeds = msp.seeding.SeedList.from_info(phase, domain.area)

# Position seeds in domain
seeds.position(domain)

# Create polygonal mesh
polygon_mesh = msp.meshing.PolyMesh.from_seeds(seeds, domain)

# Create triangular mesh
triangle_mesh = msp.meshing.TriMesh.from_polymesh(polygon_mesh)

# Plot outputs
for output in [seeds, polygon_mesh, triangle_mesh]:
    plt.figure()
    output.plot(edgecolor='k')
    plt.axis('image')
    plt.axis([-0.5, 0.5, -0.5, 0.5])
    plt.show()
Publications
If you use MicroStructPy in you work, please consider including these citations in your bibliography:
K. A. Hart and J. J. Rimoli, Generation of statistically representative microstructures with direct grain geometry control, Computer Methods in Applied Mechanics and Engineering, 370 (2020), 113242. (BibTeX) (DOI)
K. A. Hart and J. J. Rimoli, MicroStructPy: A statistical microstructure mesh generator in Python, SoftwareX, 12 (2020), 100595. (BibTeX) (DOI)
The news article AE Doctoral Student Kenneth A. Hart Presents MicroStructPy to the World, written by the School of Aerospace Engineering at Georgia Tech, describes MicroStructPy for a general audience.
License and Attribution
MicroStructPy is open source and freely available. Copyright for MicroStructPy is held by Georgia Tech Research Corporation. MicroStructPy is a major part of Kenneth (Kip) Hart’s doctoral thesis, advised by Prof. Julian Rimoli.


